


Customers worldwide rely on Wavecrest Computing for accurate, reliable Web-use management software–backed by a customer support team dedicated to your success.
Cyfin - Check Point Support 
New Release - Version 9.5.0 for Cyfin Now Available
IMPORTANT NOTE: for 9.2.8 and earlier customers please contact support for upgrade.
Join our Early Adopter Program
Receive the latest solutions and have the opportunity to provide feedback directly to our development team. To learn more click here.
Cyfin - Check Point Configuration
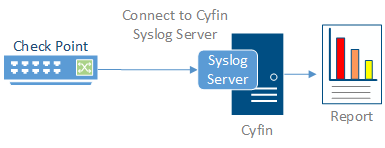
Cyfin is installed on a server, not on the Check Point appliance.
Log File Setup
Log File Types: Check Point Syslog, Check Point Log Exporter (HTTPS), Check Point Log Exporter (HTTPS)
Check Point Log Exporter for R77.30 or later
If you are running Check Point R77.30 or later, you must first use Check Point Log Exporter for exporting Check Point logs over syslog to Cyfin. Click here for the instructions from Check Point Support.
Important Notes
Commands should be run in an SSH session switched to Expert mode.
Installation
Ensure that the Log Exporter is installed on a log server for Check Point R77.30 and R80.10. Log Exporter is already integrated in R80.20.
Basic Deployment
In order to configure a Cyfin target for the logs, run the following on the log server:
cp_log_export add name cyfin_syslog target-server [cyfin_ip] target-port 1455 protocol udp format syslog --apply-now
where [cyfin_ip] is the IP address of your Cyfin server
Helpful Tools
- To remove the exporter, run:
cp_log_export delete name cyfin_syslog --apply-now
- To display the exporter's status, run:
cp_log_export status name cyfin_syslog
- To reset the current position and reexport all logs per the configuration, run:
cp_log_export reexport name cyfin_syslog
Troubleshooting Tips
If you do not see log files being exported:
- Stop the exporter by running: cpstop
- Then start the exporter by running: cpstart
If there is still an issue:
- Edit $EXPORTERDIR/targets/cyfin_syslog/targetConfiguration.xml
- Locate <log_files>1</log_files>
- Change to <log_files></log_files>
- Stop the exporter by running: cpstop
- Then start the exporter by running: cpstart
Once this part is completed in Check Point, you can then open Cyfin, go to Data Management – Log Data Source – Setup, and run through the Log Data Source Setup wizard. Upon completing the Log Data Source Setup wizard, you should start to see data in the file “SyslogXXXXXXX.txt” in the log file directory that you chose in the wizard.
Check Point CPLogToSyslog Steps
In order to export Check Point Syslog firewall logs to Cyfin for some versions of Check Point, you must first get the CPLogToSyslog utility. Contact Check Point Support to request the hotfix that contains the utility. If you are running Check Point R77.30, the utility may not be needed. Confirm with Check Point Support. The utility gives Check Point the ability to port the syslog data from the firewall to a specified IP address and port. You will want to forward the “URL filtering” logs from Check Point to the Cyfin syslog server.
Once the CPLogToSyslog utility is installed, Check Point must be configured to have the syslog data pointed to an IP address and port. These will point to the Cyfin server’s IP address and port of choice (default port is UDP 514 for syslog). Once this part is completed in Check Point, you can then open Cyfin, go to Data Management – Log Data Source – Setup, and run through the Log Data Source Setup wizard. Select the Check Point Syslog log file type and the same port you chose in the Check Point setup.
Upon completing the Log Data Source Setup wizard below, you should start to see data in the file “SyslogXXXXXXX.txt” in the log file directory that you chose in the wizard.
Cyfin Configuration Steps
Cyfin Syslog Server listens for syslog messages from your Check Point device. Both UDP-based and TCP-based messages are supported.
- Select the Check Point Syslog log file configuration in Cyfin for your Check Point device.
- Specify the Directory in which the log files will be created. The default directory is [InstallPath]\wc\cf\log.
- Select Enable Syslog Server.
- For Port Type, select UDP or TCP for the Internet protocol you want to use.
- In the Listening Port field, the default port number is 1455. The listening port will be used by your Check Point device to transfer the data. You may change this number if necessary.
- At your Check Point device, specify the IP address of the Cyfin server and the listening port, and submit the syslog messages.
- Your log files will be created and displayed in the Log File Viewer in Cyfin.
- If you have many of the same Check Point devices, use one log file configuration with one listening port, and point each Check Point device to the same listening port.
© Copyright 1996-2024 Wavecrest Computing. All Rights Reserved.